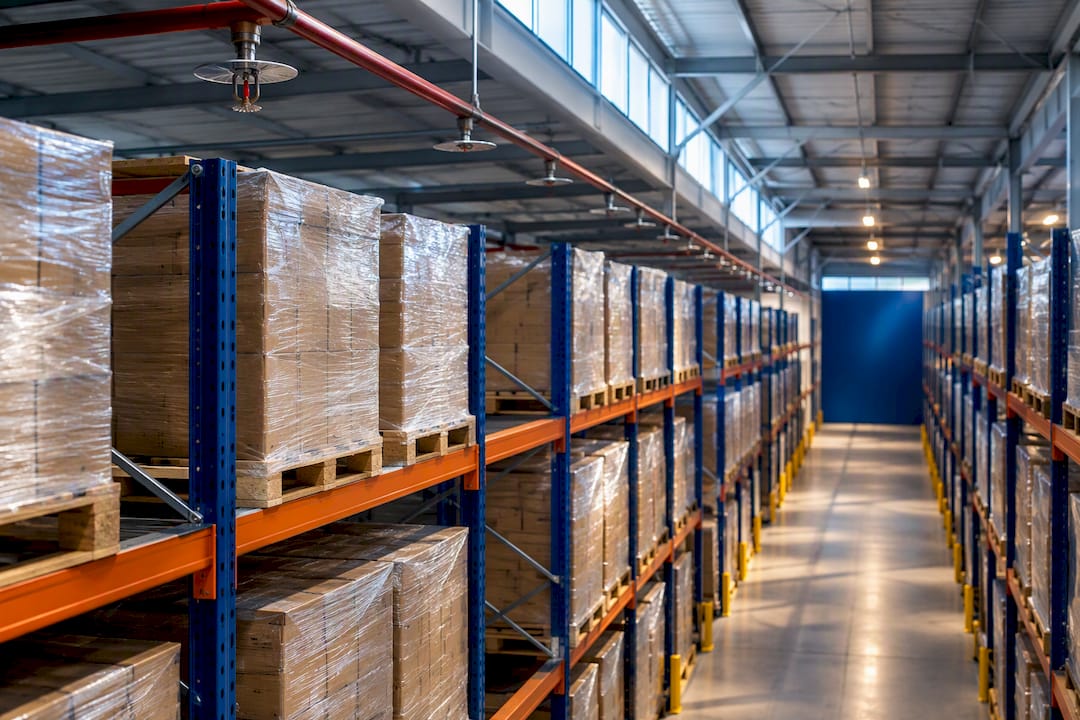
The simplest correct approach to a warehouse racking layout is to design around three priorities in order: separate pedestrians from forklift traffic, set aisle widths to match your material handling equipment, and build compliance into the layout from day one rather than retrofitting it. Get those right and capacity, workflow and cost decisions follow naturally.
TL;DR:
- A comprehensive warehouse racking layout must prioritize pedestrian-forklift separation, aisle width accuracy, and compliance from the start to ensure safety and efficiency.
- Layout decisions should be based on thorough building surveys, product throughput profiles, and matching aisle widths to specific forklift turning circles for optimal capacity.
- Dedicated traffic management plans with defined vehicle routes, pedestrian zones, and impact protection are crucial and should be mapped before installing rack systems.
- Regular inspections, signage, and strict adherence to safety standards ensure ongoing racking stability, with at least annual formal reviews and prompt impact reporting.
- Designing for future growth involves leaving expansion zones, using adjustable systems, and planning aisle widths around the most likely forklift types to avoid costly reworks.
Table of Contents
- Step-by-step layout checklist for planning racking
- Calculating aisle widths, bay counts and cube utilisation
- Designing traffic flow and pedestrian separation into the layout
- Racking safety, inspection and compliance requirements
- Matching racking components to your goods and forklifts
- Tools and software to draw and validate your layout
- Implementation checklist for commissioning the installation
- How Niche Advisory supports warehouse layout and fit-out projects
- Warehouse ceiling height and its effect on racking layout
- Aligning racking layout with warehouse workflow
- Fire safety requirements that shape racking design
- Lighting and ventilation considerations in racking layout
- Planning for future scalability in your racking layout
- What different racking layouts cost to install and maintain
- Sources
- FAQ
Step-by-step layout checklist for planning racking
A racking layout is a sequence of decisions, not a single drawing. Skipping a step usually surfaces later as a costly rework or a safety non-conformance.
- Define throughput and unit-load profile. Establish pallet counts, SKU velocity and pick method (each-picking, case-picking or full-pallet) before choosing rack type.
- Survey the building. Map column grids, dock positions, fire services, floor loading and any headroom obstructions such as sprinkler mains or lighting trunking.
- Select racking type to suit the load. Fast-moving, single-SKU pallets suit drive-in or pallet live storage; mixed SKU ranges usually suit selective racking.
- Set aisle widths against your forklift fleet. Aisle width is a function of turning circle and load length, not a fixed number, and must be matched precisely to forklift turning circles.
- Plan traffic flow and pedestrian exclusion zones. Decide routes before you decide bay positions, not after.
- Calculate capacity and set utilisation targets. Reconcile the number of pallet positions the layout yields against forecast throughput.
- Document safe working loads, operating instructions and inspection regimes. Every bay needs a signed rating before goods go on it.
A building survey that flags floor bearing capacity or slab condition issues early avoids a costly redesign once racking is ordered. Where the warehouse sits within a leased premise, a condition report completed before fit-out works can confirm what the base building will actually support.
Layout decisions also need to account for how people work, not just where goods sit.
- Place high-frequency SKUs at waist height and within easy reach to reduce awkward lifting and reaching, consistent with hazardous manual task design principles from Safe Work Australia.
- Keep pick faces in the main circulation aisle rather than a secondary aisle to cut travel distance.
- Group slow-moving stock in less accessible bays, including higher levels or deeper drive-in lanes.
Pro Tip: Draw the pedestrian and forklift routes on the layout before you place a single upright. It is far cheaper to move a line on paper than to move a rack once it is bolted down.
Calculating aisle widths, bay counts and cube utilisation
Getting the numbers right starts with usable floor area, not gross floor area. Subtract dock aprons, fire egress paths, plant rooms and any permanent exclusion zones from the total footprint before you start placing bays.
Aisle width is set by the forklift’s turning circle plus load length and clearance, not by habit or by copying a neighbouring site’s dimensions. A counterbalance forklift typically needs a wider aisle than a reach truck or an articulated narrow-aisle truck handling the same pallet, which is why aisle widths must be matched to forklift turning circles rather than set generically.
- Measure net bay footprint as beam span multiplied by frame depth, then add flue space between back-to-back rows.
- Count bays per aisle as usable aisle length divided by bay width, then multiply by the number of levels to get positions per run.
- Multiply positions per run by the number of runs to reach total pallet positions for the layout.
- Compare narrow-aisle systems, which increase position count per square metre but require specialised trucks, against wider aisles that suit standard counterbalance fleets and mixed pedestrian traffic.
As an illustrative example only: a run of multiple bays, each about one metre wide, over several levels, yields a significant number of pallet positions per aisle side. Multiplying across aisles can meet forecast throughput with some contingency built in. These figures are for illustration and every real layout depends on your own bay dimensions and level heights.
Rack selection and aisle width together account for a large share of achievable storage density, and the safe working load and turning circle requirements set the floor on how narrow an aisle can go. Chasing extra positions by shaving aisle width below what the trucks need is a false economy that trades storage for risk.
Designing traffic flow and pedestrian separation into the layout
The starting principle is to eliminate pedestrian and forklift interactions wherever the building allows it, and to minimise and tightly control whatever interactions remain. This should be documented in a site-specific plan, not left to informal practice, because traffic management should be captured in a written plan that specifies routes, exclusion zones, signage and controls.
A workable traffic management plan for a racked warehouse typically covers:
- Defined vehicle routes and one-way circulation where volume allows it.
- Pedestrian walkways physically separated from forklift aisles, especially near pick faces and pack benches.
- Exclusion zones at blind corners, dock doors and end-of-aisle turning points.
- Speed controls, mirrors and line marking at intersections between vehicle and pedestrian paths.
- Barriers or bollards protecting racking uprights and pedestrian crossing points.
Planning routes and exclusion zones at the drawing stage, before racking is ordered, avoids the retrofit cost of adding bollards and barriers once the layout is in operation, a point industry safety guidance makes repeatedly. Pick areas and pack benches should sit off the main forklift thoroughfare, with a dedicated pedestrian path connecting them to amenities and exits.
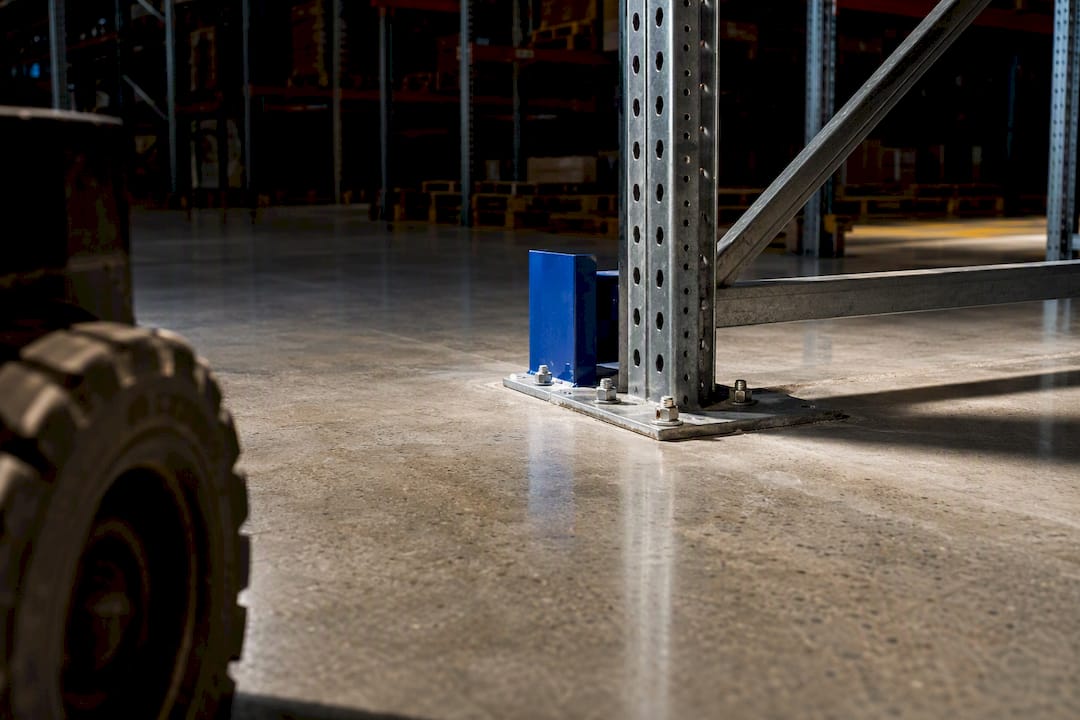
End-of-aisle protection deserves particular attention in high-bay or high-density layouts, where impact loads from a misjudged turn can cause real structural damage. Specifying heavier uprights or dedicated end barriers at these points is cheaper than repairing a damaged frame later.
Pro Tip: Walk the proposed routes on the empty warehouse floor, forklift key in hand, before you finalise bay positions. A drawing can hide a turn that is tighter in practice than it looks on paper.
Staff need training on the finished plan, not just a copy of it in a folder, and the plan itself should be reviewed whenever fleet, layout or throughput changes.
Racking safety, inspection and compliance requirements
Racking design and ongoing maintenance in this context are governed by the AS 4084 series, which sets design requirements in Part 1 and operation and maintenance requirements in Part 2. Both parts should inform racking selection and the inspection regime from the outset, not be treated as an afterthought once the racking is installed.
Every bay needs safe working load signage that reflects the actual rated capacity of that specific bay configuration, and that signage has to be enforced in practice, not just displayed. WorkSafe Victoria’s guidance is explicit that aisle widths, SWL signage and racking condition are compliance requirements, and that any deformation to beam connectors or uprights needs immediate assessment by a competent person or an engineer.
Formal competent-person inspections should occur at least every 12 months, supplemented by frequent visual checks from operational staff. An annual inspection catches slow degradation; daily operator checks catch fresh impact damage before it becomes a structural problem.
- Log every impact, however minor, and report it the same shift it happens.
- Quarantine and tag any bay showing bent uprights, bowed beams or missing safety clips until it is assessed.
- Never restock a damaged bay to “see if it holds”, a scenario directly linked to a fatality in WorkSafe Victoria’s safety alert on overhanging and improperly loaded racking.
- Keep a register of inspections, repairs and competent-person sign-offs on site.
- Update SWL signage whenever the pallet type, load height or beam configuration changes.
Site documentation should also spell out operating instructions in plain language: what can go where, what the height limits are, and who to call when something looks wrong.
Matching racking components to your goods and forklifts
Racking is only as safe as its weakest matched component. Uprights, beams, decking and safety clips all need to be specified against the actual loads and equipment on site, not a generic catalogue configuration.
- Confirm upright height and beam capacity against the heaviest pallet the bay will ever carry, not the average.
- Check decking type suits the pallet base, since some pallet standards do not “key” properly into certain beam profiles.
- Fit safety clips on every beam connection; a rack that relies on gravity alone to hold beams in place is a rack waiting to fail.
- Match aisle and bay dimensions to the forklift’s actual turning circle and mast height, including any narrow-aisle or articulated trucks in the fleet.
- Add end-of-aisle protection and upright guards wherever forklifts turn near racking, and specify heavier-section uprights in high-impact zones.
Switching pallet types, such as moving from timber pallets to post pallets, is a common trigger for hidden problems, because pallets that do not key into the beams properly can slip or exert concentrated loads that deflect beams. Sheet materials and other irregular loads often need engineered cradle racks or lateral restraints rather than standard selective racking. Any time a component change is being considered, loop in the racking supplier or a structural engineer before goods go back on the shelf.
Tools and software to draw and validate your layout
A simple sketch tool is fine for early concept work, but a warehouse layout that will be built and certified needs a CAD package or specialist warehouse design software once bay counts and aisle widths are locked in. Symbol libraries and racking templates from suppliers speed this up considerably, since standard bay, upright and beam symbols scale accurately against your building’s column grid.
- Use sketch tools for rough concept layouts and stakeholder discussions.
- Move to CAD or specialist warehouse design software once dimensions are set, so drawings are accurate enough for supplier quoting and installation.
- Run simulation or circulation checks on the finished layout, including turn-radius checks at every aisle end and a physical walk-through with the forklift.
- Feed the drawing with real data: pallet footprints, forklift specifications and SKU turnover, not assumed averages.
A layout that looks correct on screen can still fail a real turning-circle test, so a walk-through with the actual equipment remains the final check before racking is ordered.
Implementation checklist for commissioning the installation
- Confirm final drawings, anchor bolt specifications and manufacturer certification before installation begins.
- Have a competent supervisor check frame seating, fixings and anchor torque during installation, not just at the end.
- Commission the racking with SWL signage in place, written operating instructions on site, and staff trained on the finished layout.
- Set a post-install monitoring schedule covering daily visual checks and the first competent-person inspection within 12 months.
Anything found out of specification at handover, from a missing safety clip to an under-torqued anchor, should be resolved before stock goes on the racking, not scheduled as a follow-up task.
How Niche Advisory supports warehouse layout and fit-out projects
Getting a racking layout right often runs into the same constraint as an office fit-out: the physical space, lease terms and project delivery all need to line up. Niche Advisory provides workplace strategy and project and construction management for tenants and owner-occupiers, acting exclusively on the tenant’s side rather than the landlord’s.
For a warehouse tenant weighing up a racking redesign against a lease renewal, an independent corporate tenant advocacy engagement can confirm whether the current premises actually supports the layout being planned before committing capital to it.
Warehouse ceiling height and its effect on racking layout
Ceiling height sets the practical limit on how many levels a racking system can carry, and it interacts with fire services in ways that are easy to overlook. Clear height, measured from finished floor to the lowest obstruction such as a sprinkler head, roof truss or lighting fitting, determines the top beam level you can safely use.
A warehouse with generous eave height but a low sprinkler deflector position will still be constrained to whatever clearance the fire system requires above the top of stock. Measuring clear height at multiple points across the floor matters too, since older buildings often have uneven roof lines or services that dip in places a single measurement near the entrance would miss.
Higher ceilings support taller racking and more positions per square metre of floor, which is why cube utilisation, not just floor area, is the real measure of storage capacity. But taller racking also increases the consequences of an impact or overload at height, so upright specification and inspection frequency both need to scale with the extra levels.
Where headroom is tight, drive-in or pallet live systems that pack density into fewer, wider bays can sometimes outperform tall selective racking that cannot reach its full height potential. The right call depends on the specific building, not a rule of thumb borrowed from a taller site.
Aligning racking layout with warehouse workflow
A racking layout only works if it matches how goods actually move through the building, from receiving through to despatch. Placing fast-moving SKUs near the despatch dock and slow movers deeper in the building cuts travel distance on every pick, which adds up across thousands of picks a week.
Workflow alignment also means thinking about where put-away happens relative to where picking happens. A layout that forces put-away forklifts to cross active pick aisles creates exactly the pedestrian and vehicle conflict that a good traffic management plan is meant to avoid.
Cross-docking flows, where goods move straight from inbound dock to outbound dock with minimal storage time, need a layout that keeps a clear lane between the two, separate from the main storage aisles. Mixing that flow into general storage aisles slows both processes down.
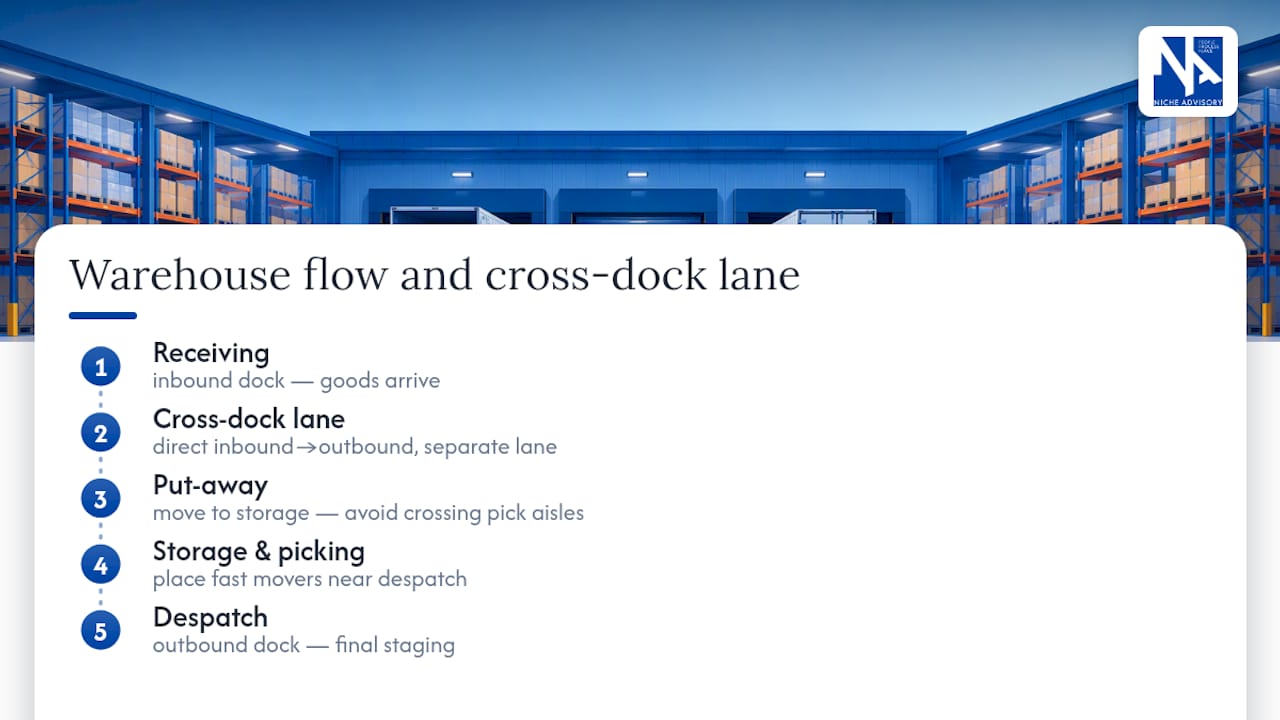
The most efficient layouts are usually the ones designed backwards from the despatch process, working out what needs to reach the dock fastest and placing it accordingly, rather than filling bays in whatever order the racking was installed.
Fire safety requirements that shape racking design
Fire safety requirements directly constrain how racking can be laid out, most obviously through sprinkler head clearance. Stock stored too close to a sprinkler deflector can interfere with water distribution in a fire, which is why maximum storage height below sprinklers is a hard limit, not a guideline to be optimised around.
Flue spaces, the gaps between back-to-back racking rows and between racking and walls, also serve a fire safety function by allowing water penetration and limiting fire spread between aisles. Reducing flue space to squeeze in extra positions can undermine the very fire protection the building’s sprinkler system was designed around.
Aisle width itself plays a role too, since fire brigades and emergency responders need enough clearance to move through the building if required. Any layout change that affects storage height, commodity class or flue spacing should be checked against the building’s existing fire engineering before it is finalised, since the original fire system design was based on specific assumptions about how the space would be used.
Getting this wrong is not just a compliance problem. It changes how a fire behaves and how effectively the building’s own fire protection systems can respond.
Lighting and ventilation considerations in racking layout
Racking rows, especially tall ones, cast long shadows and can block light distribution across a warehouse floor. Placing rows so they run parallel to the main lighting bays, rather than across them, keeps aisles better lit without needing extra fittings.
Ventilation follows a similar logic. Dense racking blocks natural airflow paths, and in warehouses without full mechanical ventilation, that can create pockets of poor air quality or uneven temperature, particularly in high-bay storage where heat rises and stratifies near the roof. Leaving clear paths between racking rows and any wall-mounted or roof-mounted ventilation intakes helps air move through the building rather than around a wall of stock.
Both factors matter more in warehouses handling temperature-sensitive goods or where staff spend extended periods picking at height, since poor lighting at the pick face slows work and increases the chance of picking errors, while poor ventilation affects comfort and, in some goods categories, product condition. Neither is usually the first thing a layout plan considers, but both are cheaper to solve at the design stage than after the racking is bolted down and the shadows and airflow patterns are already fixed.
Planning for future scalability in your racking layout
A racking layout designed only for today’s throughput tends to need expensive rework within a few years, so building in some flexibility from the start usually pays for itself. The easiest lever is leaving a clear expansion zone, an area of the floor kept free of fixed infrastructure so additional racking rows can be added without relocating existing aisles.
Choosing bolted, adjustable racking systems over highly customised or welded configurations also keeps options open, since beam heights and bay widths can be changed later without replacing the whole system. This matters most for businesses with seasonal stock swings or growing SKU counts, where the pallet mix in twelve months’ time may look nothing like it does today.
Aisle widths deserve the same forward thinking. Designing for the narrowest truck currently in the fleet can lock a warehouse out of adopting a different truck type later without a full layout redesign. Where growth is likely, it is often worth designing aisle widths around the truck type most likely to be used in the next equipment cycle, not just the current one.
Flexibility has a cost, usually in the form of some unused capacity held in reserve, but it is generally smaller than the cost of a full racking relocation triggered by growth nobody planned for.
What different racking layouts cost to install and maintain
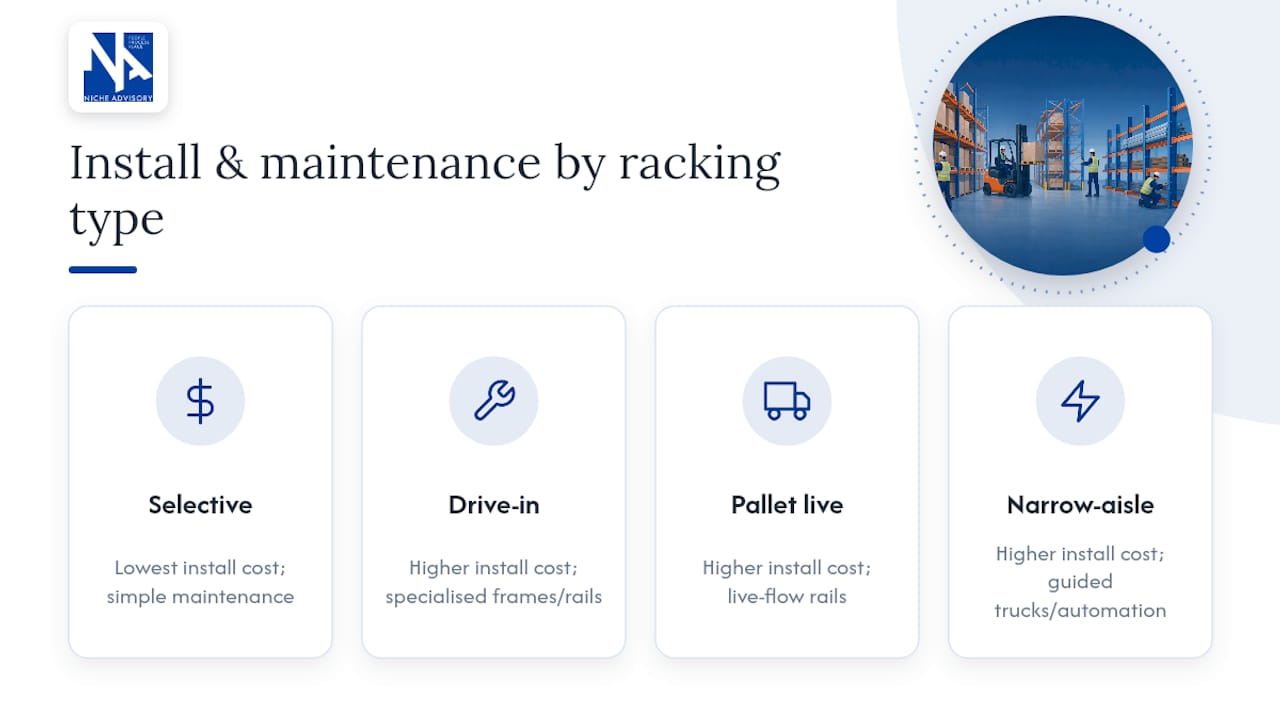
Racking cost is driven mostly by type and density, not just by the number of pallet positions delivered. Selective racking is generally the cheapest to install per position and the simplest to maintain, since standard components and straightforward inspection routines apply. Drive-in, pallet live and narrow-aisle systems cost more per position to install, reflecting the specialised frames, rails or guidance systems involved, and some also require dedicated MHE, which adds to the overall project cost beyond the racking itself.
Maintenance costs scale with complexity too. A selective racking system with standard forklift access is straightforward for a competent person to inspect and for operators to check daily. Narrow-aisle systems with guided trucks or automated elements typically involve more specialised maintenance, both for the racking and for the guidance infrastructure.
Installation quality also affects long-term cost. Racking installed without proper anchor torque checks or frame seating verification tends to generate more damage incidents over its life, each of which triggers a competent-person assessment and possible remedial works. Getting installation oversight right the first time is cheaper than repeated repairs later.
For any business weighing up racking investment against a lease term, project and construction management support can help align the capital cost of a racking upgrade with how much lease term remains, so the investment is not stranded if a relocation is on the horizon.
Sources
- Pallet racking operation and maintenance | WorkSafe Victoria
- Steel storage racking, Part 2: Operation and maintenance — Standards Australia
FAQ
How do I set up a warehouse racking layout?
Start by defining throughput and pallet profile, then survey the building, choose racking type, set aisle widths to your forklift fleet and plan pedestrian exclusion zones before finalising bay positions. Document safe working loads and inspection routines as part of the same process, following the design and maintenance principles in AS 4084.
What is the ideal warehouse layout?
There is no single ideal layout, since the right configuration depends on unit-load type, throughput and building constraints such as ceiling height and column grid. A well-designed layout balances storage density with safe aisle widths matched to the forklift fleet and clear pedestrian separation, as outlined in Safe Work Australia’s traffic management guidance.
What are the four main types of warehouse layout?
Common warehouse layout types include selective racking, drive-in racking, pallet live storage and cantilever racking, each suited to different unit loads and throughput patterns. Selective racking suits mixed SKU ranges needing direct access to every pallet, while drive-in and pallet live systems favour high-density storage of fewer SKU types.
How should I organise warehouse shelving for efficiency?
Place fast-moving stock near despatch and within easy reach, and group slow movers in less accessible bays or higher levels. Keep pick faces facing the main aisle and separate pedestrian walkways from forklift routes to reduce travel distance and interaction risk, in line with hazardous manual task design principles from Safe Work Australia.
How often does racking need to be inspected?
Racking needs frequent visual checks by operational staff plus a formal inspection by a competent person at least every 12 months. Any impact damage or visible deformation should trigger an immediate assessment rather than waiting for the scheduled inspection.